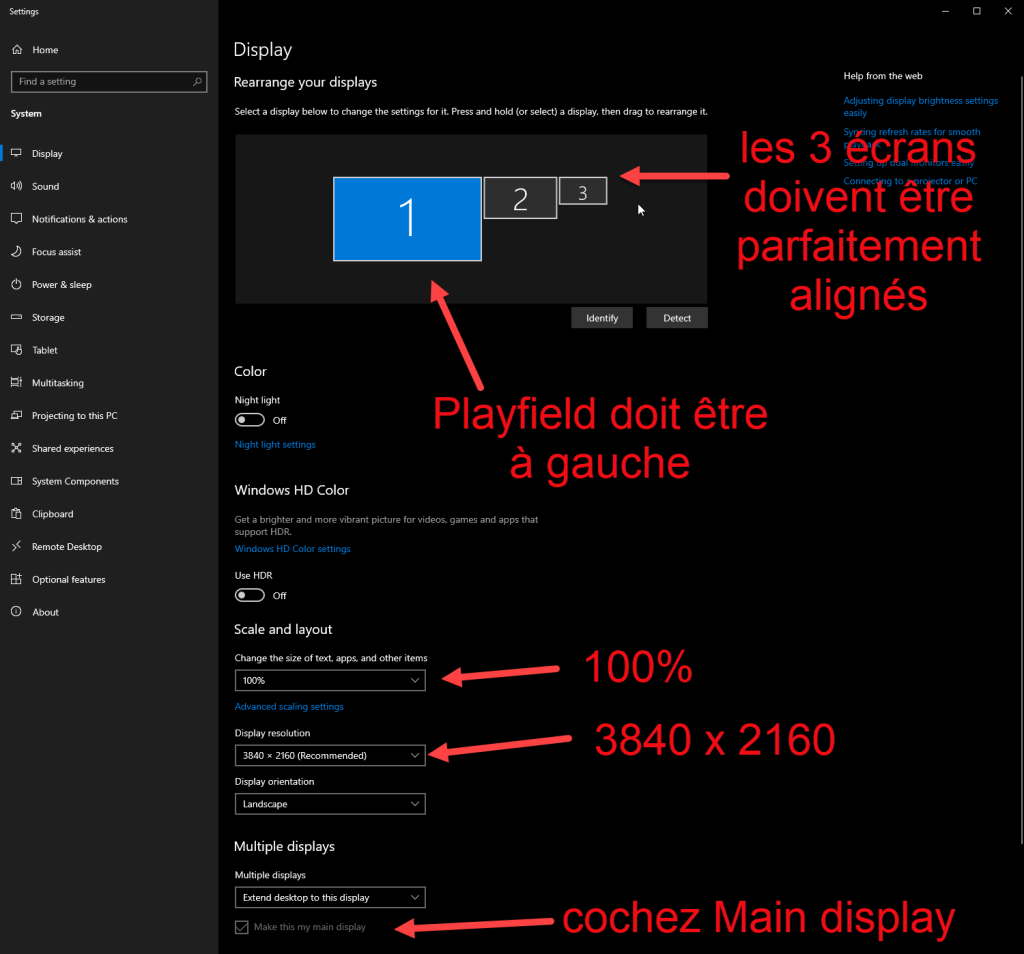
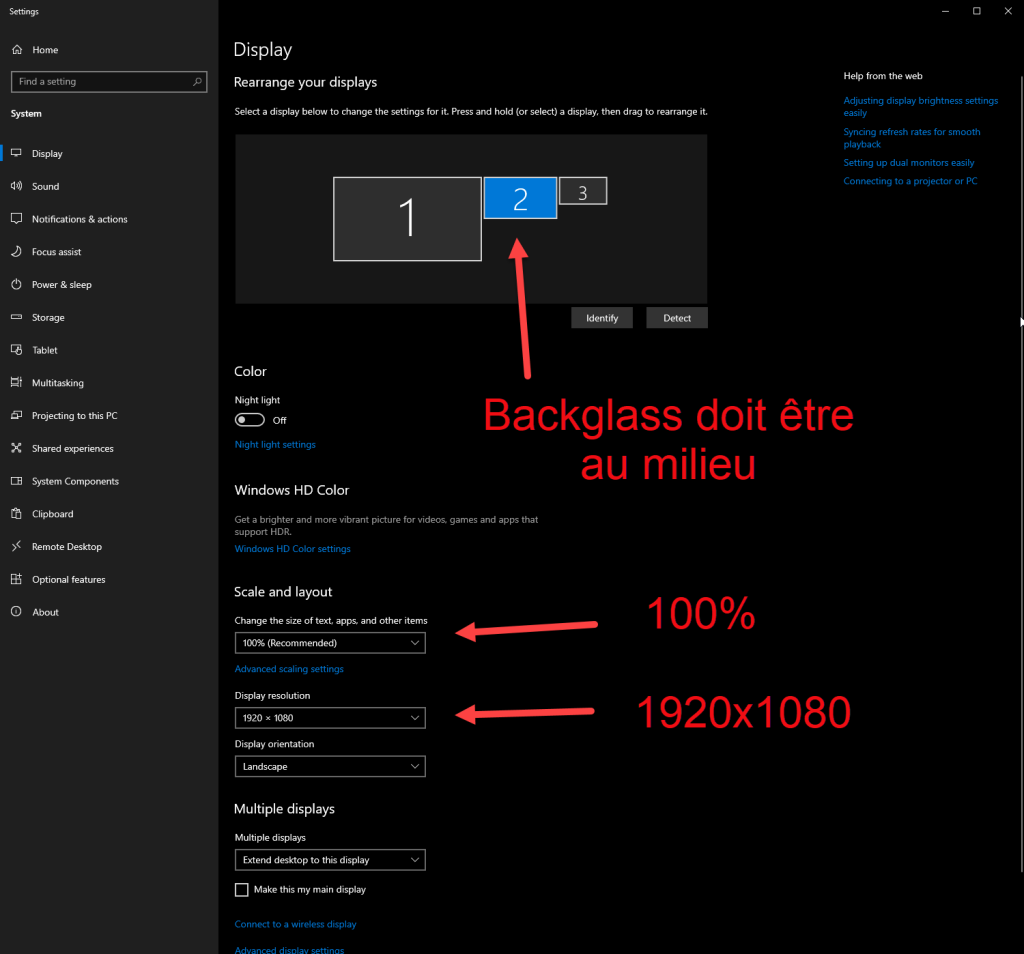
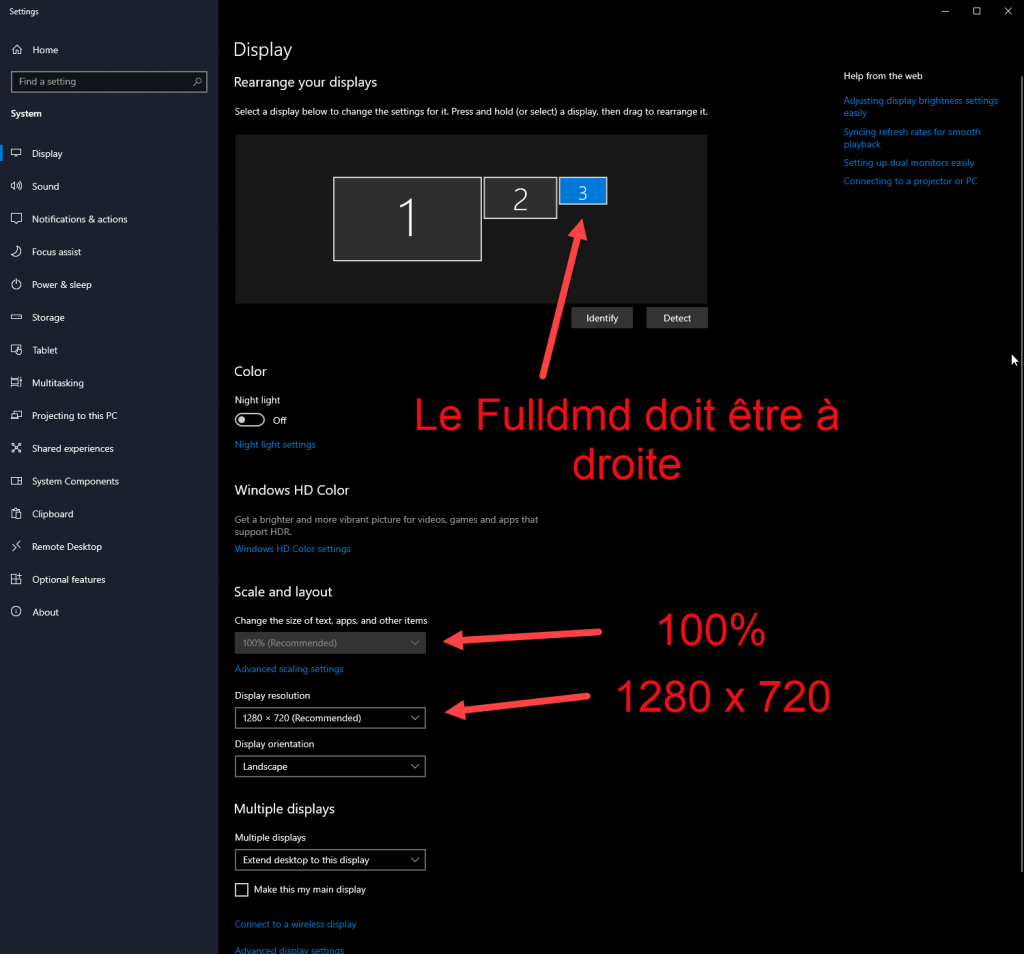
If the drive does not start automatically, access the BIOS and modify your computer’s boot settings. The drive has to be first in the boot sequence. It is recommended to connect only the 4K playfield for the first boot. Right-click on the desktop and make sure the playfield screen is set to 3840 × 2160 (4K) at 100% scaling. Then connect the backglass and DMD. The backglass must be set to 1920 × 1080 at 100% scaling, and the Full DMD to 1280 × 720 at 100% scaling. See screenshots below…
4k TV for the Playfield must have a Game Mode option on.
Always turning on screens before the computer.
Follow these steps for BIOS:
- Restart your computer.
- As soon as the computer starts, look for a message on the screen indicating which key to press to access the BIOS. This may vary depending on your computer’s manufacturer, but common keys are usually F2, F10, Delete, or Esc. The message usually appears briefly, so you’ll need to be attentive.
- Press the indicated key to access the BIOS. If you miss the opportunity, restart again and try another key.
- Once in the BIOS, use the keyboard arrows to navigate through the menus. The exact keys and layout of the BIOS may vary depending on the manufacturer, but you’ll generally look for a “Boot” or “Startup” menu.
- In the boot menu, look for the option called “Boot Order” or “Boot Priority.” Select this option and press Enter.
- You’ll then see a list of available boot devices, usually represented by their name or model. Use the keyboard keys to move the desired boot device (the Pinball SSD in question) to the top of the list. This will determine the order in which the computer will attempt to boot devices.
- Once you’ve rearranged the list according to your preferences, save the changes. Look for an option such as “Save and Exit” or “Exit and Save Changes.” Follow the instructions to save your changes and exit the BIOS.
- The computer will now restart using the Pinball SSD in question.
Please note that the exact steps may vary depending on your computer’s manufacturer and the BIOS version. If you’re unsure about the available options or don’t feel comfortable modifying BIOS settings, it’s recommended to consult your computer’s manual or contact the manufacturer’s support for additional assistance.
Displays configuration for the 3 screens version 4K
It is recommended to connect only the 4K playfield for the first boot. Right-click on the desktop and make sure the playfield screen is set to 3840 × 2160 (4K) at 100% scaling. Then connect the backglass and DMD to the computer. The backglass must be set to 1920 × 1080 at 100% scaling, and the Full DMD to 1280 × 720 at 100% scaling. See screenshots below…
Make sure your screens are well-placed, right-click on the desktop and choose “Display settings”:
- The top of all monitors must be perfectly aligned at the top
- The Playfield screens is 3840 x 2160 for the 4K version and must be at 100% (if you have a screen of another size, it must be changed in the Windows screen settings). The Backglass must be at 1920 x 1080 at 100% and FullDMD at 1280 x 720 at 100%
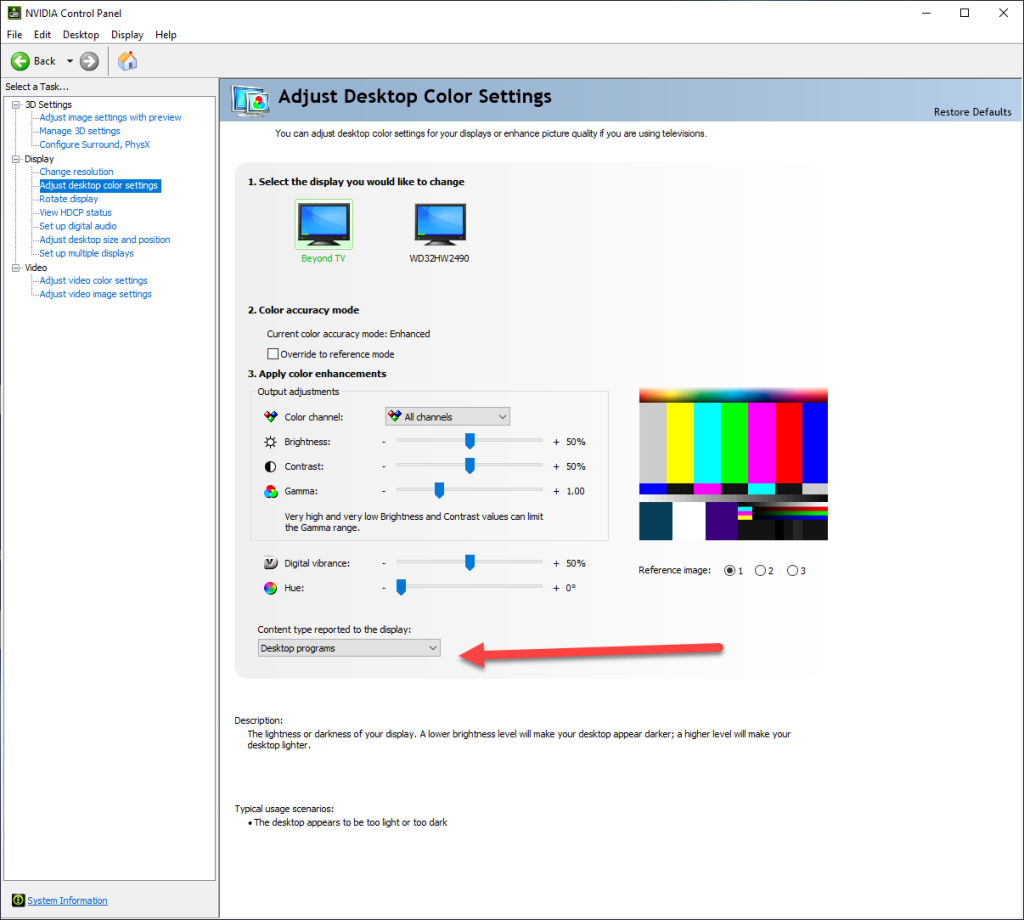
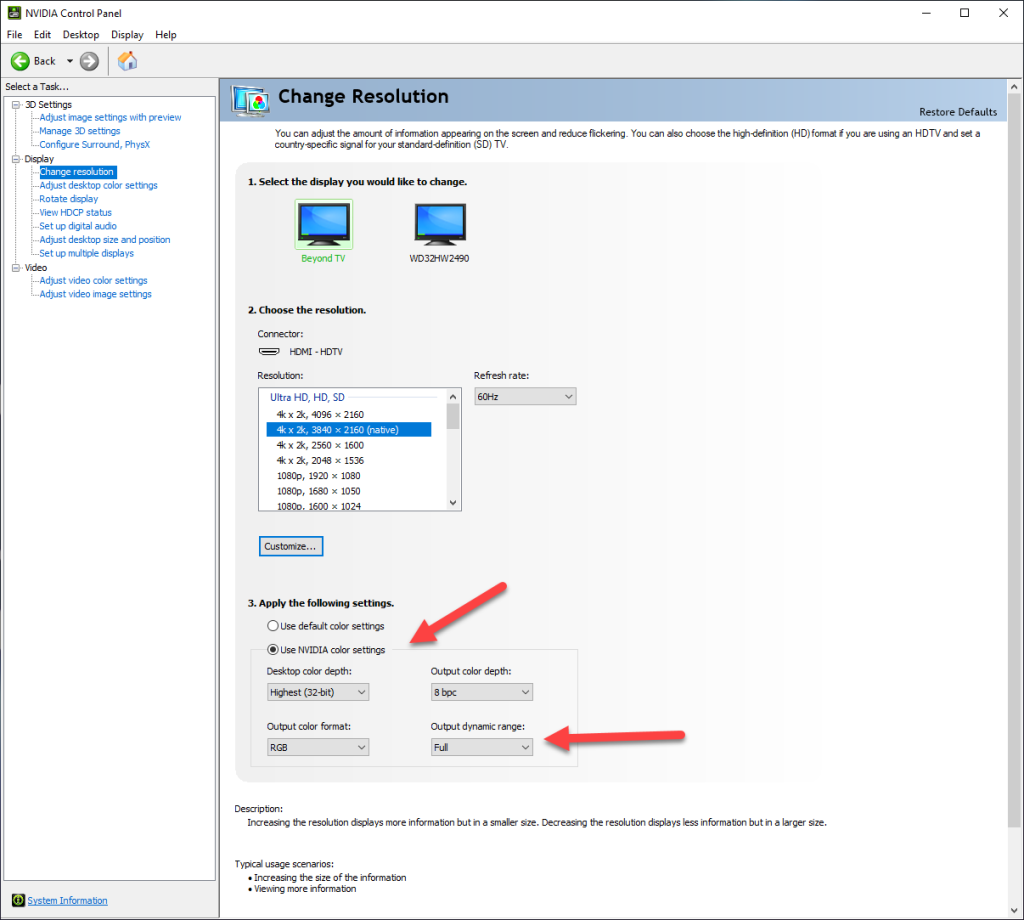
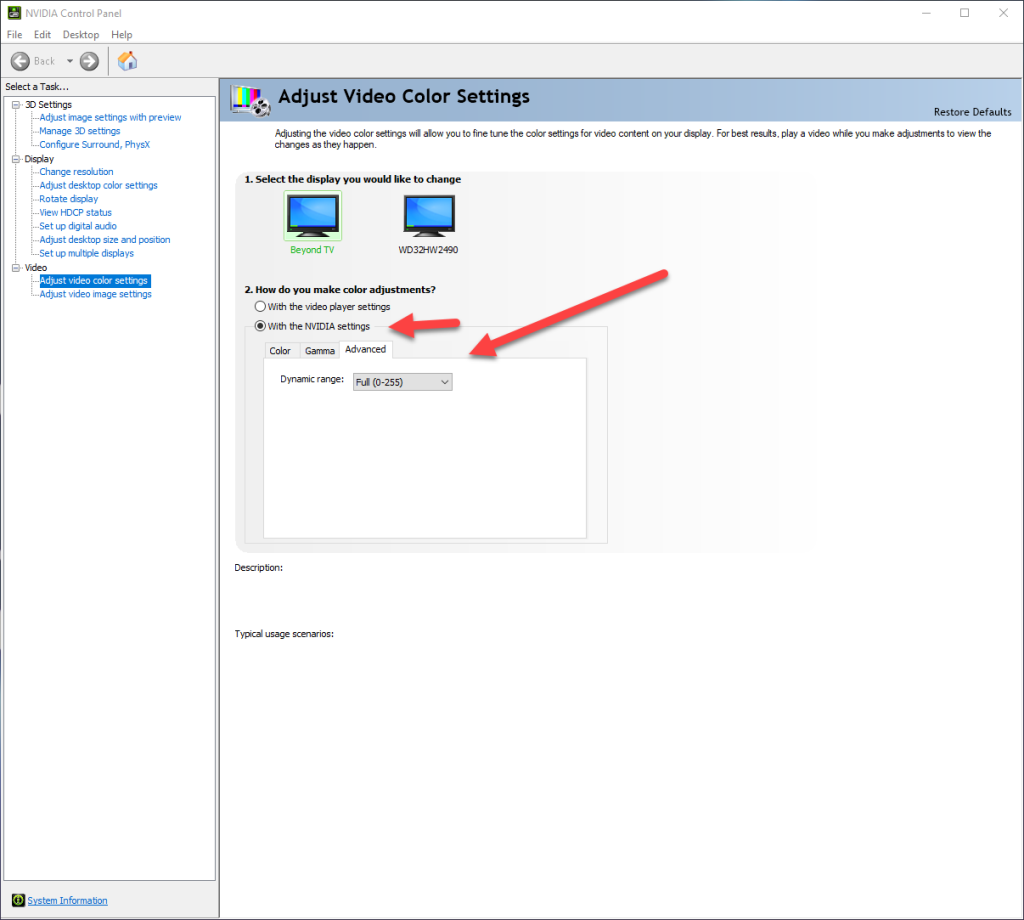
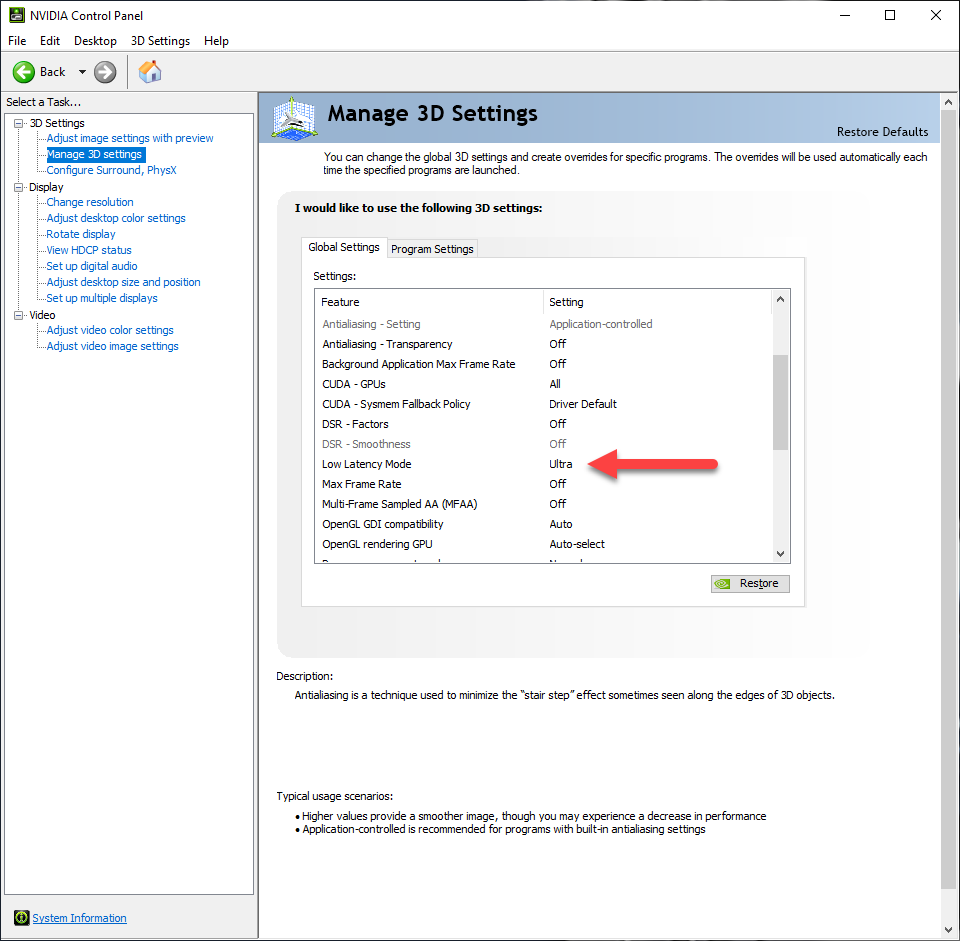
Nvidia Settings
Make sure that the options for your Nvidia graphics card are set as shown below (do it for all screens):
If you’re experiencing screen issues, check the following:
Go to C:/vPinball/Visual Pinball/B2Sserver, click on B2S Screen Resolution Identifier.exe, adjust the settings according to your screens if needed, and save the settings.
Open one of the VPX 10.8 tables, go to Preferences > Video/Graphics Options, and verify the screen settings.
Go to the PinUP folder on your desktop, click on PinUP Pack Editor, then click on Configure Display Locations. Make sure the Playfield and Backglass match your screen setup, then save the settings.
For Pinball FX3, go to C:/vPinball/Pinball FX3 and run PinballFX3.exe. Once the program launches, click on the pinball icon at the top (Cabinet Support), then verify that your screen sizes match your actual displays exactly. Then exit the Pinball FX3 program.
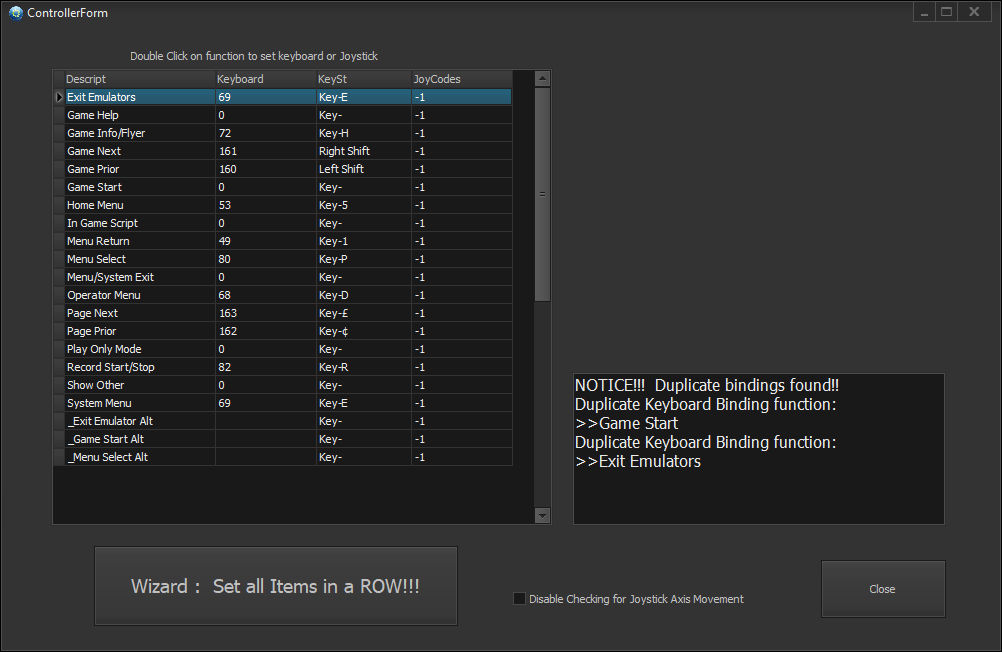
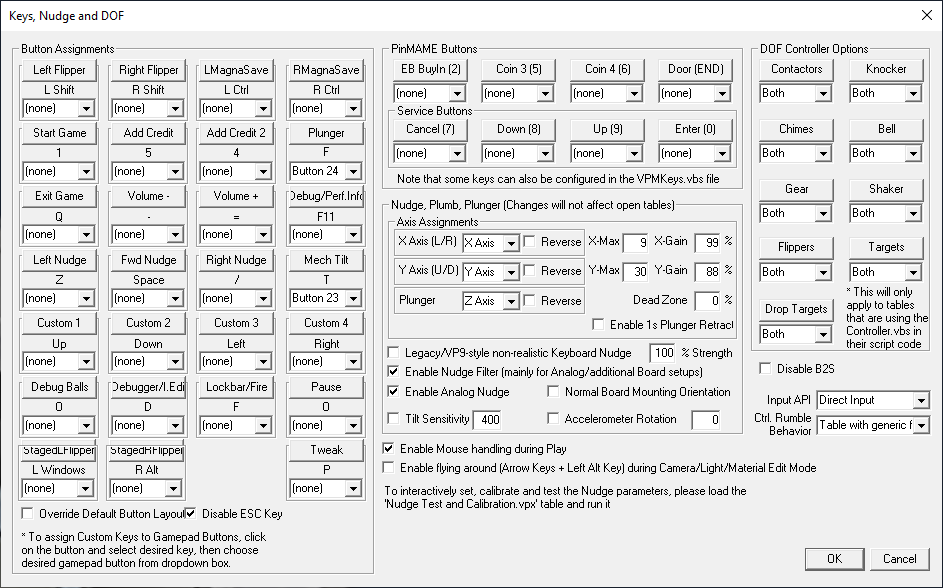
Buttons set up
If you have a PinOne, Arnoz, or KL25Z (Pinscape) board, you must configure your buttons using the software associated with that board. Visit their website for more information on how to do this.
Default configuration:
- “Shift L” Left Flipper
- “Shift R” Right Flipper
- “Ctrl L” for Left Magnasave
- “Ctrl R” for Right Magnasave
- “5” for Coins or 25 cents
- “1” for Start
- “F” for the Plunger
- “E” to exit
- “Enter” is used in the Pinup frontend to start tables and access table options in VPX 10.8
You can change the buttons to something else, but you must also update them in the VPX, FX3, Pinball FX and Pinup Popper programs. All those programs are in C:/Vpinball
If you want to use JoyToKey for your buttons, if your arcade board doesn’t have any associated software:
JoyToKey will be installed with the SSD. You can use another card or program for your buttons, just delete JoyToKey in Vpinball folder. If you want to use JoyToKey, here how to configure your buttons, go to the bottom right, click the ^ and click the joystick Icon:
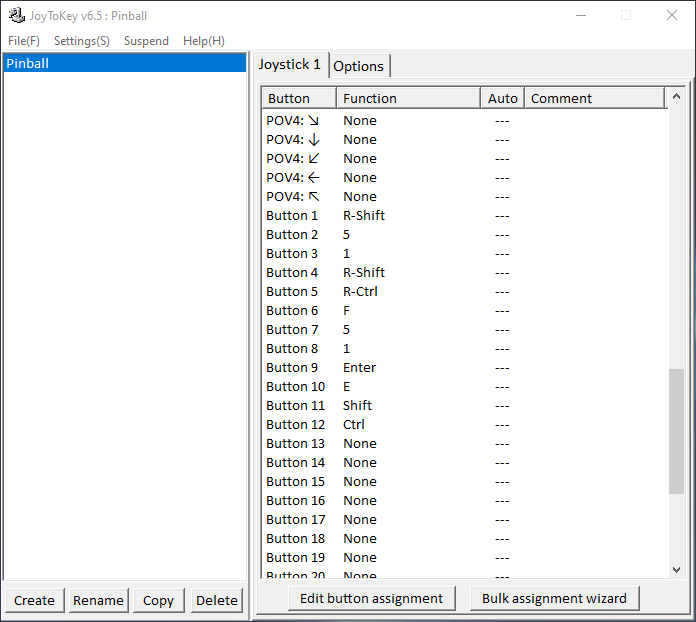
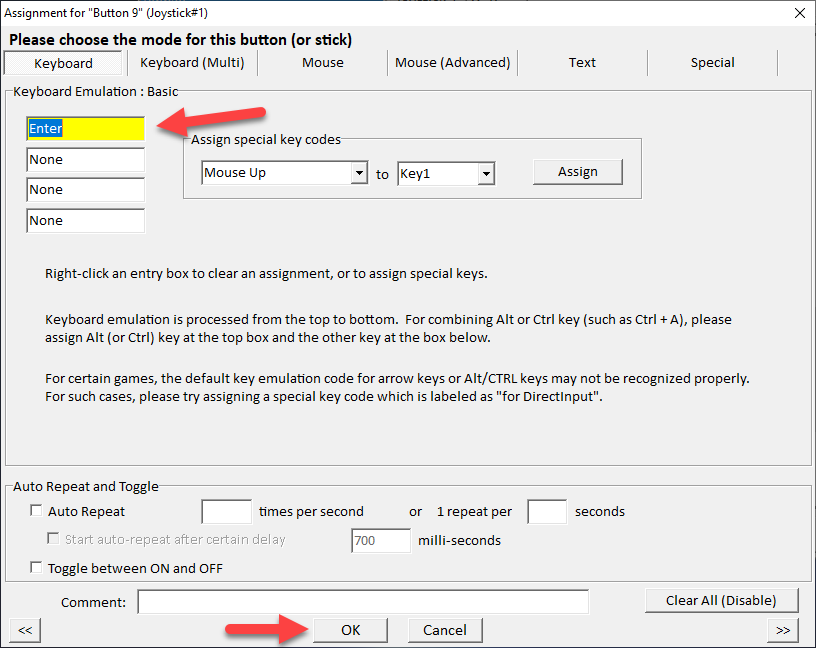
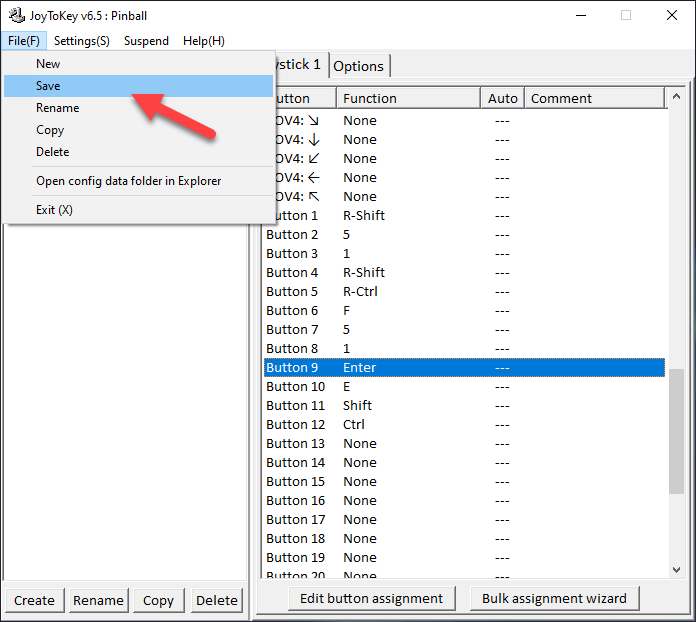
Configuring your buttons with JoyToKey: To open the program, go to the desktop and click on the JoyToKey icon in the taskbar at the bottom of the screen to launch it. Then, go to the bottom-right corner and click on the joystick icon to open the configuration.
- On the bottom bar of the Windows desktop, click on the JoyToKey icon in the right corner.
- Click on the Joystick 1 tab and configure your buttons.
- “Shift L” and “Shift R” on the keyboard are the left and right flippers.
- “5” is for the coin slots or 25 cents.
- “1” is for Start Player 1.
- “F” is for the plunger.
- “E” to exit.
- “Ctrl L” and “Ctrl R” are for left and right Magnasave.
- “Enter” for Pinup frontend to start a game and table options while playing
If you want to JoyToKey to start automaticaly when windows start, add a shortcut of JoyToKey in the startup folder, see how below…
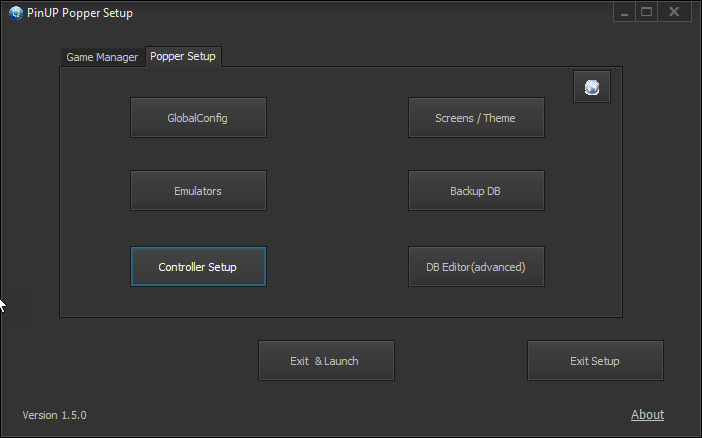
To configure Pinup Popper to start automatically on Windows 10, you can add it to the Startup folder. Here’s how:
Using the Run Dialog:
- Press
Win + Rto open the Run dialog. - Type
shell:common startupand press Enter. This will open the Startup folder. - Copy and paste the shortcut of Pinup Popper at C:/Vpinball/PinUpSystem/PinUpMenu.exe – Shortcut into the Startup folder. If not there, make a shortcut of PinUpMene.exe
These methods will make the program start automatically when you start Windows Spectre.
Then, test everything by clicking on Pinup Popper Frontend on the Windows desktop and playing on a table.
We recommend an Intel Generation 6 and higher and minimum 8G or higher for the graphic card for everything to work smoothly and without lags in 4K. For example: RTX 3050, 3060, 3070 (8G or higher). For Pinball FX, an RTX graphic card is needed.
You should also adjust the Playfield settings on your TV to configure the display properly. 4k TV must have a Game Mode option on.
DOF is now included, but there is no configuration file, as each machine has different accessories, such as toys, knockers, etc.